Showing posts with label GAFE. Show all posts
Showing posts with label GAFE. Show all posts
Friday, January 13, 2017
Sunday, October 16, 2016
HyperDocs + Google Forms: A guide to simple digital lesson design

One day my colleague, Ashley Sansoe an amazing and innovative teacher, asked me to come into her class to brainstorm ways to work digital math lessons into her combo class. She wanted one grade level to be doing something productive and meaningful on their Chromebooks while the other grade level was working with her.
After brainstorming a few ideas we decided that creating HyperDocs in Google Forms would give us the most bang for our buck. (Shout-out to Claire Tsougarakis for bringing this idea up in one of our EdCamps and planting the seed for how powerful forms are for HyperDocs!)
Creating HyperDocs in Google Forms allows us to integrate the powerful lesson design of HyperDocs into one manageable place. The value of using a Google Form for these short one-day lessons is that it allows the teacher to see all of the work in one place (on a spreadsheet). With the ease of the integrated self-grading quiz feature students were provided instant feedback on the questions and can then go back to review, reflect and then retake the quiz!
These lessons assume that the content has been taught in class and this is an extension of the lesson. This lesson could easily be used to flip your class and provide you with a preview of what your class already knows coming into the lesson.
You could use this same format for an eLearning lesson plan with a deeper dive. Check out 50 elearning activities, templates and tutorials for more ideas.
Below is an example HyperDoc created with Google Forms for 3rd graders.

We wanted to incorporate the lesson design that makes HyperDocs so effective in our form so we included sections that we hope do that. Here is how we designed our HyperDocs and have included a template for you to copy and use to get started. Of course, as with any template, use what you want and change it to make it your own!
Review/Reteach
After the Name short answer question (which we highly recommend making required) we embedded videos that reteach and/or reinforce the lesson. Check out 30 Great YouTube Channels for Teachers for inspiration or record and upload your own!
Recording your own video is a great way to bring the classroom to your students at home. One of the easiest ways to do this is with Screencastify. A very simple chrome extension that allows you to easily record, edit, and share videos by directly uploading to YouTube, sharing through Google Classroom or by downloading to your computer. Check out 24 ways to create great classroom video with Screencastify for more information and ideas.
Recording your own video is a great way to bring the classroom to your students at home. One of the easiest ways to do this is with Screencastify. A very simple chrome extension that allows you to easily record, edit, and share videos by directly uploading to YouTube, sharing through Google Classroom or by downloading to your computer. Check out 24 ways to create great classroom video with Screencastify for more information and ideas.
| Adding a YouTube video to forms is easy peasy! |
Show What You Know!
This section offers students an opportunity to apply their knowledge in a standardized test format. You can create multiple-choice, checkboxes and multiple answer questions with the embedded quiz feature that will automatically give students a grade after they submit. They can view their score then review, reflect and retake their quiz. A few tips Ashley and I learned along the way are below =)
*Make these questions required and the others (except name) not required so that students can go back and easily retake this section of the assessment without needing to retype in their longer answers or resubmit links to activities.
*Be sure the box for "Limit to 1 response" is unchecked so that they can take their quiz multiple times. You can also collect email addresses (just in case someone decides to put a funny name instead of their real one ;) and restrict responses to your G Suite domain users.
*Finally, uncheck the box that allows respondents to see "correct answers" under quiz settings so that students don't get the answer key when viewing their score!
Share Your Thinking
This one question section asks students to explain how they arrived at their answer. In math, this could be describing what method they used to solve the problem. In reading it could be justifying their answer with text evidence. One question that really goes deep and gives them the experience of explaining their thinking through typing on the computer.

Apply Your Skills
Here you can add some sort of activity where the students are creating or manipulating something in order to show what they know. It could be an activity like in a Google Drawing or a quick creation of a Google slide that utilizes images to capture their thinking. Once finished students will click the share button then "get shareable link" to copy the URL to their creation. They will paste the link into the form and once submitted the teacher will have all of the links to the students' work on the spreadsheet in one place.

Connect and Extend
Although not a part of the actual form, we include a link to a game or activity that reinforces the skill in a fun way under the form in Google classroom. ABCya! has some great ones to check out.
Information for the teacher. What do you see?
Whole-Class Summary:
When you click on responses in "edit" mode of your form you will see a summary of your whole class (or at least of those who submitted the form). If students took the quiz more than once you will see all of their results in this summary so take that into consideration when viewing the data. The information you get from the summary can give you valuable insight into what holes you may have as a class and inform your whole group instruction.
Individual Data:
You can view your student's' individual results either by clicking on "Individual" in the summary of the responses or you can create a spreadsheet. On a spreadsheet, you can view their "quiz" section answers and by sorting by name you can see how many times the took the quiz to get their desired score. All of their long answer questions are in one column and the links to their drawings are in another. You can give students feedback on their work through private comments in Google Classroom or on their "Apply" activity such as a Google Drawing. Verbal, face to face, feedback works too!

Ready to Get Started?
Ready to create your own HyperDoc in Google Forms? Make a copy of this template or go to forms.google.com and select "Blank Quiz" to get started! You can assign your form through Google Classroom or create the link and share it with students directly or through your LMS.
Want to share your lesson with others?
Once you are finished you can share your form by creating a forced copy link so that others can use it too.
To create a link that will make a forced copy follow the steps below: (thanks Sean Fahey for showing me how to do this!
- Click on the three dots in the upper right-hand corner and go to "add collaborators"
- Then change the sharing settings to "Anyone with link can edit"
- Finally, change the end of the URL from "edit" to "copy"

HyperDocs were created by Lisa Highfill, Kelly Hilton, and Sarah Landis and they are such a game-changer! Check out my previous post HyperDocs! Need I Say More???, their incredible website HyperDocs.co and definitely get your hands on a copy of their book The HyperDoc Handbook today!
Friday, April 15, 2016
Hack Your HyperDoc with Google Drawings! Three Simple Ways to Get Started.
HyperDocs, created by Lisa Highfill, Kelly Hilton and Sarah Landis, are a serious gamechanger when moving beyond just providing devices to truly integrating educational technology. (You can read ALL about HyperDocs and how to get started creating them here!) Google drawings, which I lovingly refer to as the "unsung hero" of Google Apps, is an incredibly versatile tool for getting students creating and showing what they know in a fun, visually stimulating format. Here are three simple ways to get started!

To insert a Google Drawing into a HyperDoc or other Google doc (how to GIF below)


Getting a Google Drawing into a Google Slides presentation is a little more involved but it is worth it, especially if you are using it as way for students to share out what they have learned with the whole class. When students insert a png or jpeg of their drawing other students can make comments but can't edit the original image in the collaborative slides presentation.
You will want to assign or have a forced copy (change "edit" at the end of the drawings url to "copy" then copy and paste the entire url) of this template which is formatted to fit a Google Slide. Then students can create a Google Drawing and have an image that is perfectly formatted for slides! Here is an easily adaptable template for you to use in your HyperDoc. Collaborative Google Slides with Google Drawings TEMPLATE. Don't forget to change the share settings to "anyone with link can edit" before assigning to the students.
Some ways to get your students connecting and collaborating with this fabulous "GAFE Smash"!
Looking for a quick way to bookmark all of the Google Drawings resources shared above plus more? Check out this padlet full of Googley goodies! Have fun and don't forget to share your creations with @TsgiveTs!

1. Embed a Google Drawing as a template in a HyperDoc for students to edit.
One of my favorite ways to use Google Drawings is to embed a Drawing in a HyperDoc that students can edit by double clicking. This allows you to have something such as a graphic organizer, virtual math manipulatives or even a sort in the doc for students to complete. When the HyperDoc is copied or assigned in Google Classroom the drawing is also copied so that each student gets their own copy of your template automatically embedded in the doc.To insert a Google Drawing into a HyperDoc or other Google doc (how to GIF below)
- Place your cursor where you would like the drawing to be embedded.
- Click on "insert" then "Drawing".
- Create your template by inserting images and/or text boxes.
- Click "Save and Close".
To edit the drawing your students will double click, make their changes, then click "Save & Close". When they turn in the document their saved drawing will be embedded. A great way for students to show what they know!
Examples of ways to use Google Drawings templates in HyperDocs.
- Have students sort words by moving them into the column they belong. In this Food Chain HyperDoc students are categorizing organisms as either "producers, consumers, or decomposers". Google Drawings can be a great way for students to sort words for your word work time. Another great way to incorporate word word is to have them create "magnetic" poetry. Check out Kasey Bell's Collaborative Magnetic Poetry with Google Drawings (refrigerator image included =). She has a link to a template ready for you to use in your next poetry unit!
- Bring math into your HyperDoc with virtual math manipulatives. In this Fifth Grade Geometry, Measurement and Coding HyperDoc students are using Eric Curts' protractor template and moving the arrows to make an angle they worked with previously. You can find TONS of great math manipulatives in his Teaching Math with Google Drawings doc that you can make a copy of and then use to hack your math HyperDoc! Want even more math manipulative Google Drawings goodies? Check out Alice Keeler's post Using Google Drawing for Math Manipulatives
- Have students read a text, watch a video or view an image in a HyperDoc then use a graphic organizer or note taking template for brainstorming, drafting, taking notes, or responding. Lots of graphic organizers and templates are already shared and ready for you to copy make your own. Eric Curts has 40+ Graphic Organizers in this Templates folder! Once in the folder be sure to click "Add to Drive" (how to GIF) so that you can make a copy of all the templates. Matt Miller shares 15 FREE Google Drawings graphic organizers in this Ditch That Textbook past. Barbra Drasby @MsDrasby has an awesome Story Creator graphic organizer that includes links to Help Hotline for students when they get stuck.
2. Students insert a Google drawing into a HyperDoc to demonstrate learning.
Students can use easily insert a Google Drawing into their HyperDoc to show what they have know or to create an image or infographic. In this HyperDoc template students will demonstrate new learning visually with a Google Drawing.
Examples of a ways students can use a Google Drawing to show what they know.
- Have your student create word art. In this One Word HyperDoc students create word art in Google Drawings to share their One Word that describes their goals, dreams, ambitions and who they want to be in the new year. This could be used at the beginning of a new calendar year or at the beginning of a new school year.
- Using a diagram, cross-section, map or other visual students can recreate and label their own image. After learning about the Solar System in this Space Explorer HyperDoc third grade students draw and label the planets using an illustration as their guide.
- After a science demonstration or experiment students can draw and label their finished project. They can also use drawings to plan out their model or project. Even first graders can use the tools in Google drawings to draw lines and boxes to represent a circuit. After visiting our STEM lab students can share their learning in a STEM Lab Reflection HyperDoc.
| Early second grader's model of littleBits circuit. |
| Fifth grader's model of cubelets robot. |
3. Get "GAFE SMASHING" with those HyperDocs! Docs + Slides + Drawings = Great Googley Goodness.
A fantastic way to get students connecting and collaborating in a HyperDoc is to have students insert a Google Drawing into a collaborative Google Slides presentation to share out what they have learned with the rest of the class or beyond!Getting a Google Drawing into a Google Slides presentation is a little more involved but it is worth it, especially if you are using it as way for students to share out what they have learned with the whole class. When students insert a png or jpeg of their drawing other students can make comments but can't edit the original image in the collaborative slides presentation.
You will want to assign or have a forced copy (change "edit" at the end of the drawings url to "copy" then copy and paste the entire url) of this template which is formatted to fit a Google Slide. Then students can create a Google Drawing and have an image that is perfectly formatted for slides! Here is an easily adaptable template for you to use in your HyperDoc. Collaborative Google Slides with Google Drawings TEMPLATE. Don't forget to change the share settings to "anyone with link can edit" before assigning to the students.
Some ways to get your students connecting and collaborating with this fabulous "GAFE Smash"!
- Students create a graphic design or ad to demonstrate their knowledge and apply it. In this Simple Machines Unit HyperDoc students are challenged to design a product using one or more simple machine(s) that would help someone with disabilities. Then they will create an ad for their product using Google Drawings and share the image in a collaborative slides presentation.
- After viewing media or reading text about a topic students can create an infographic or poster in Google Drawings to share with the class in a collaborative Google Slides presentation. Students can comment on each others' drawings, ask questions or give feedback. In his post Google Drawings interactive posters (no glue sticks necessary!) Matt Miller shares some great tips for getting students creating some fantastic posters in Google Drawing!
More Google Drawings Resources

Sunday, April 10, 2016
Exploring the Google Cultural Institute: Simple Ways to Bring Virtual Field Trips, Beautiful Art, Historic Images & More To Your Students.
The Google Cultural Institute is full of incredible images including beautiful images of famous artwork and artist. I stumbled upon this resource this morning and was blown away by the endless possibilities of using this in the classroom. There are three Featured Projects; Historic Moments, World Wonders, and Art Projects. I know that I have barely scratched the surface of what this site has to offer but here is a quick overview of each.
Historic Moments
What really took my breath away was exploring the Historic Moments Collections. Here you can "Explore online exhibitions detailing the stories behind significant moments in human history. Each exhibition tells a story using documents, photos, videos and in some cases personal accounts of events." "Historic Moments - Google Cultural Institute." Historic Moments - Google Cultural Institute. N.p., n.d. Web. 10 Apr. 2016.
Google Cultural Institute is INCREDIBLE! Amazing images AND you can share directly to Google Classroom! #gci #GAFE https://t.co/pTuPC2FnDy— Karly Moura (@KarlyMoura) April 10, 2016
In the short period of time I was exploring I found some amazing resources that will get your students hooked on history.
- Studying the Civil War? Check out these Symbols of Battle: Civil War Flags.
- Ready to begin a unit Women's Suffrage? Check out Suffragettes: Make More Noise.
- Frederick Douglass From Slavery to Freedom: The Journey to New York City tells the story of one of the bravest men in history as he fought to end slavery.
World Wonders
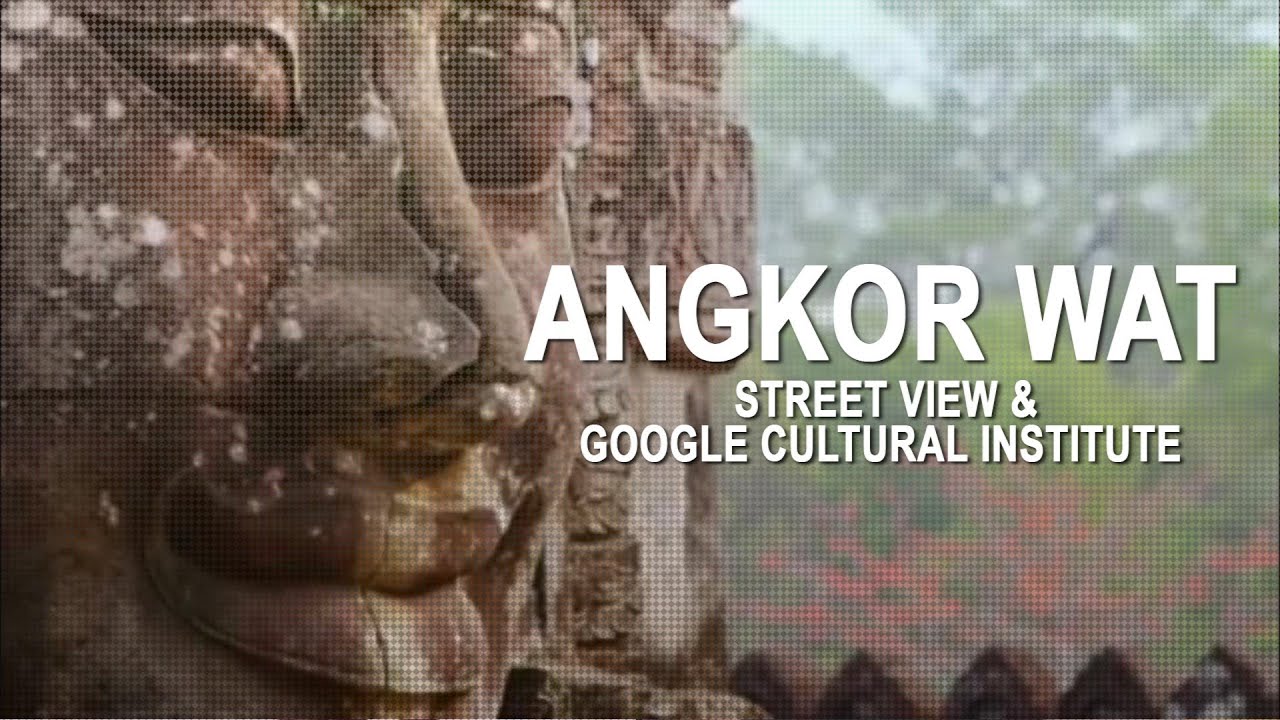 |
| Angkor Wat, Street View. Digital image. N.p., n.d. Web. <https://i.ytimg.com/vi/nWyKgZc78Mo/maxresdefault.jpg>. |
In World Wonders you and your students can explore the world the way it is today and in ancient times. Historic images, an embedded map of the location and Google Street view transports your students to historic sites around the globe! So many more to choose from but here is a look at a few that caught my eye.
- Take your students to Egypt with a virtual field trip to the Pyramids of Giza!
- Transport your students way back in time as they discover the wonder of Stonehenge, Avebury.
- Explore the beauty and be awed by the incredible Grand Canyon! Four street views and over 1,000 images make this a fantastic virtual field trip.
Art Project
Diving into Art History? Check out the immense Art Project section. You can search by artist, medium and more! The compare feature allows you to see two images side by side for a comparison. This would be a very useful tool if you are studying specific artist, medium, time period or other attribute. To compare click the compare icon in the lower left hand corner.
Then click on the image you want to compare and finally click on the compare icon in the upper left hand corner next to the + sign to add it.
Repeat with the next image you want to compare.
Share to Google Classroom!
Go Mobile
Want to take the Google Cultural Institute with you on the go? Check out the Arts and Culture App available for Android and IOS.
There are so many possibilities for using this amazing resource in the classroom. I would love to hear how others are using it to bring history to life with your students.
Thursday, April 7, 2016
HyperDocs! Need I say more????
This post was updated on 6/11/16 to include links to new videos and resources.
I love HyperDocs. Love, love, love them. I love making them, I love co-creating them with other teachers, and most of all, I LOVE watching and connecting the kids while they work on them. If you aren't familiar with this awesome digital tool keep reading for the 411 on HyperDocs!
Where did HyperDocs come from?

A hyperwhat?
Isn't a hyperdoc just a doc with hyperlinks???

Click here to see a larger version of this image.
OK I'm interested, how do I learn more?
At the CUE 2015 National conference held on March 17-19th 2016, Lisa held a session called Extreme Pedagogy Makeover using HyperDocs. This session gave us an overview of what HyperDocs are and how to get started. Check out the HyperDocs Explained page on Lisa's website and watch the entire session below!
NEW WEBSITE ALERT!!!

The official Teachers Give Teachers website is here! An INCREDIBLE site filled with amazing resources. You can Take 1 by searching through the ever growing library of shared HyperDocs created by teachers everywhere. OR you can Give 1 by registering on the site (easy peasy to do, you can register with Google) and upload your OWN HyperDoc (see LOTS of resources on how to create your own below) to share with the world! Go to TeachersGiveTeachers.net and check it out, it's pretty dang awesome.
I'm hooked! How do I get started creating?
Three ways to get started with HyperDocs.
1. Use a template to guide you.
My favorite way to begin using HyperDocs is with a template. Lisa, Sarah and Kelly have created some FABULOUS templates you can copy and use. They are a great way to get started making HyperDocs. As I began to do some trainings with my staff and district I started creating some HyperDoc templates that included links to resources and ideas for each section. I spoke about the power of templates and Google tools when I was a guest on their weekly show "HyperDoc Hangouts on Air". See the episode below and get links to all of the templates and resources I shared by clicking "show more" under the YouTube video.
2. Remix someone else's already awesome HyperDoc!
The great thing about Twitter and TeachersGiveTeachers.net is that LOTS of teachers are sharing their amazing HyperDocs for FREE online. I post mine all the time! Here is a link to my shared HyperDocs folder that I will continue to add to (most have also been added to the website). The best part is that the teachers posting their work encourage you to take their HyperDoc and tweak it to turn it into one that works for you and your students (just be sure to put "inspired by" and the original creator's name at the bottom)! THAT is the power of TeachersGiveTeachers.net. In addition to the terrific trio there are some incredible HyperDoc creators sharing their resources online. Follow these people on Twitter, check out their blogs or websites and snag their HyperDoc gems!
 | ||||||||||
| Rocky Logue @slogue89 7th Grade Teacher, Templeton, CA mrloguesroom.com
|


3. Start from a blank slate.
Open up a new Google Doc or Google Slides presentation and get creating! Lisa, Sarah and Kelly have got you covered with their How-To HyperDoc website! This site gives you step-by-step directions for creating your own hyperdoc. Also check out Lisa's "HyperDocs Explained" webpage for more ideas and links. Scroll down to Getting Started and check out the "Tips for Creating your own HyperDoc" link!

But WAIT There's MORE!
The HyperDoc Handbook is FINALLY Here!
Lisa, Sarah and Kelly have written a book! The HyperDoc Handbook has finally been released and it is already the #1 Best Seller in Computers and Technology!

Order your copy on Amazon today and jump on the HyperDoc train! Don't forget to write a review if you love it and spread the love on Twitter with #HyperDocs and @TsGiveTs.
Friday, January 8, 2016
Insert a GIF into a Google Doc or Slide
I was asked by a teacher at my site to help her students "jazz" up their Google Slides presentations on biomes. While reading up on the cool ways to use Google Slides I found out that you can insert a GIF into a slide! I didn't know you could do that so I tried on a Google Doc and it worked there too! You may already know how to do this but if not here's how.
1. Record your GIF or find one that you want to use.
Alice Keeler has an extremely helpful blog post called How to Use Snagit to Create Animated GIFs . That is how I learned to make them and found out how easy it is! Remember, they must be under 20 seconds and that's harder than you think it might be.
2. Grab the link to the GIF URL.
- If it is in your drive click on the .gif file then click on the "link" icon to copy your link.
- If you are getting your GIF from a site like Giphy.com you will need to click "advanced" and copy the GIF download URL.
3. Go back to your Google Doc or Slide.
- Click "insert" then scroll down to "image"
- Insert image "By URL"
- Paste GIF URL
Easy peasy! You now have an animated GIF in your Google Doc or Slide!
Ideas for using this handy little trick:
- Add even MORE pizazz to your hyperdoc with an animated GIF. Check out Tips for Creating Your Own Hyperdoc by Lisa Highfill
- Multiply yourself by inserting an animated "how to" GIF directly into a Google Doc or slide to give students directions.
- Give students one line to a story, have them make a GIF to tell their part then put them all together in one slides presentation.
- Make your own presentation pop with a funny GIF on the opening slide.
- Use any of these 8 Interactive Google Slides Activities for Classroom Excitement by Matt Miller and an animated GIF!
- Insert animated GIFs into your blog post, like I did here =)
Do you use GIFs in your Google Docs or Slides? Share your awesome ideas in the comments below.
Wednesday, November 4, 2015
10+ Ways to Get Students Creating CHROMETASTIC Digital Stories!
Digital storytelling is an effective and engaging way for students to use digital media production to show what they know. On November 2nd, #TOSAChat welcomed our second guest moderator Ryan O'Donnell (@creativeedtech) to discuss digital storytelling. TONS of fabulous ideas were shared, way too many for just one blog post, so I decided to start with the great Googley goodness and will follow up with a post all about Digital Storytelling with iPad apps, stay tuned!
When bombarded with a ton of excellent resources it's important to find a simple & familiar place to start and grow from there, for many that place is Google Apps for Education along with simple chrome extensions already available to us.
1. YouTube is the first app that comes to mind when discussing making or watching videos. YouTube is chock FULL of amazing resources for us when looking to consume information and is a fabulous platform for creating too! Lisa Highfill (@lhighfill) is an incredible resource when it comes to teaching with YouTube. Get kids familiar with digital storytelling through YouTube. Check out Lisa's amazing site Teaching with YouTube to get some fabulous ideas for ways to use this awesome app in the classroom! To flip our students' role from consumers to creators of digital stories Ari Flewelling (@edtechari) suggests having them use YoutTube editor to create a picture slideshow as an easy introduction to video editing. Check out this Google Support page to learn how simple YouTube editor is to use!

2. As both Scott Padway (@ScottPadway) and Greg Moon (@GMMoon1) pointed out, WeVideo is a very easy to use Video editing program that is compatible with Google Drive! It is a perfect option for use on chromebooks and is available on the Chrome Web Store. You can upload up to 5 min of video publish time for free each month and 2GB of cloud storage. If you are looking for more publishing time or want to purchase multiple accounts WeVideo (@wevideo) offers a special price for educators which you can check out on their pricing page.


3. Google Slides are an easy way to get students creating digital stories. Josh Harris (@EdTechSpec) recommends adding a chrome extension like Snagit or an app like MoveNote to add narration to slides. Students can use Google Slides to create comic strips and add narration for a fun spin on digital storytelling. Eric Curts (@EricCurts) has a ton of resources on all things Google Slides. Check out his page on Creating Comic Strips with Slides for a sample project, training video and more!

4. Who doesn't remember the fun of reading an awesome Choose Your Own Adventure story? They are engaging to read and take a lot of creativity to write! Both Jody Green (@peerlessgreen) and Ryan O'Donnell (@creativeedtech) gave a shout out to using Google Slides as a way to create a choose your own adventure story. Once again Eric Curts is a go to resource. His Creating Interactive Presentations page includes a help guide, training video and best of all a link to "Dragon Quest" a sample interactive choose your own adventure story using Google Slides. In addition to slides, Google Forms is another great Google Apps tool that can be used to create choose your own adventure stories. Dustin Adams provides a great tutorial on how to use forms for creating a CYOA story if you want to try it out. "The Woods" is a nice example of a CYOA style story using forms. Ryan also shared a fabulous example of a CYOA story he wrote using Inklewriter "Time of the Spinning Jenny".


5. Students can create digital stories by writing their own magazine using this awesome Google Slides TIME magazine template shared with us by Ryan O'Donnell. You can leave the story to be told with text and images or add narration with the ideas from #3!

6. My Maps is another great Google Apps For Education tool but it isn't the first one that comes to mind when thinking about telling digital stories. Susan Stewart (@TechCoachSusan) knocked it out of the park with her idea to combine My Maps and Screencastify (a screen video recorder) for creating digital stories. My Maps is a great way to incorporate social studies into digital stories. Lisa Highfill (@lhighfill) has a playlist of MyMaps tutorials to get you started.

7. Google Drawing is like the unsung hero of Google Apps for Education. There are many opportunities for engaging activities including the fabulous ideas from Rachel Marker (@RachelMarker) who suggests having students create a comic strip style drawing to tell a digital story. If students are showing what they know about a story they have read they can insert a text box and provide evidence to support their thoughts about the book. Geri Coats (@GeriCoats) shared an example of a character poster activity that has students combine an image of a character, with a trait, and commentary. Matt Miller (@jmattmiller) recently wrote a post giving a much needed shout out to this underutilized app. Check out 10 Engaging Google Drawing Activities for Students for even more great ideas!


8. Pablo Diaz (@teachingusingtech) recommends using Google Story Builder, an easy to use app that allows students to create digital stories as easily as writing on Google Doc. They can add their own characters and even personalize with music. Google Story Builder is fun and incredibly easy to use that your students can begin using tomorrow!

9. Blogging gets students writing for an authentic audience. Geri Coats (@GeriCoats) suggests using Blogger as place for students to publish their digital stories. Blogger is a great blogging platform because since it is a Google App it has a familiar feel for students who use GAFE tools. ReadWriteThink.org has a useful strategy guide for teaching with blogs for students in grades 6-12.

10. Showcasing your students' digital stories is easy to do with Google Sites. Josh Harris (@EdTechSpec) recommends using sites as a place for students to embed their digital stories told using videos, docs, slides and more. Check out Google Sites As a Tool For Student Portfolios from Flipped Education for tons of resources for using sites.

BONUS!
Check out this awesome Chromebook Digital Presentations Google Doc that Scott Padway (@ScottPadway) shared with us. Once your students are familiar with digital storytelling and are ready for a choice and challenge you can turn them loose and let them pick. He has even included tutorials for the apps! Ben Lausten (@LaustenTeaching) had the brilliant idea to create a collaborative google doc to crowdsource the awesome ideas shared during #TOSAChat. Check out the #TOSAChat on Digital Storytelling doc and add ideas of your own!


When bombarded with a ton of excellent resources it's important to find a simple & familiar place to start and grow from there, for many that place is Google Apps for Education along with simple chrome extensions already available to us.
1. YouTube is the first app that comes to mind when discussing making or watching videos. YouTube is chock FULL of amazing resources for us when looking to consume information and is a fabulous platform for creating too! Lisa Highfill (@lhighfill) is an incredible resource when it comes to teaching with YouTube. Get kids familiar with digital storytelling through YouTube. Check out Lisa's amazing site Teaching with YouTube to get some fabulous ideas for ways to use this awesome app in the classroom! To flip our students' role from consumers to creators of digital stories Ari Flewelling (@edtechari) suggests having them use YoutTube editor to create a picture slideshow as an easy introduction to video editing. Check out this Google Support page to learn how simple YouTube editor is to use!
2. As both Scott Padway (@ScottPadway) and Greg Moon (@GMMoon1) pointed out, WeVideo is a very easy to use Video editing program that is compatible with Google Drive! It is a perfect option for use on chromebooks and is available on the Chrome Web Store. You can upload up to 5 min of video publish time for free each month and 2GB of cloud storage. If you are looking for more publishing time or want to purchase multiple accounts WeVideo (@wevideo) offers a special price for educators which you can check out on their pricing page.
3. Google Slides are an easy way to get students creating digital stories. Josh Harris (@EdTechSpec) recommends adding a chrome extension like Snagit or an app like MoveNote to add narration to slides. Students can use Google Slides to create comic strips and add narration for a fun spin on digital storytelling. Eric Curts (@EricCurts) has a ton of resources on all things Google Slides. Check out his page on Creating Comic Strips with Slides for a sample project, training video and more!
4. Who doesn't remember the fun of reading an awesome Choose Your Own Adventure story? They are engaging to read and take a lot of creativity to write! Both Jody Green (@peerlessgreen) and Ryan O'Donnell (@creativeedtech) gave a shout out to using Google Slides as a way to create a choose your own adventure story. Once again Eric Curts is a go to resource. His Creating Interactive Presentations page includes a help guide, training video and best of all a link to "Dragon Quest" a sample interactive choose your own adventure story using Google Slides. In addition to slides, Google Forms is another great Google Apps tool that can be used to create choose your own adventure stories. Dustin Adams provides a great tutorial on how to use forms for creating a CYOA story if you want to try it out. "The Woods" is a nice example of a CYOA style story using forms. Ryan also shared a fabulous example of a CYOA story he wrote using Inklewriter "Time of the Spinning Jenny".
5. Students can create digital stories by writing their own magazine using this awesome Google Slides TIME magazine template shared with us by Ryan O'Donnell. You can leave the story to be told with text and images or add narration with the ideas from #3!
6. My Maps is another great Google Apps For Education tool but it isn't the first one that comes to mind when thinking about telling digital stories. Susan Stewart (@TechCoachSusan) knocked it out of the park with her idea to combine My Maps and Screencastify (a screen video recorder) for creating digital stories. My Maps is a great way to incorporate social studies into digital stories. Lisa Highfill (@lhighfill) has a playlist of MyMaps tutorials to get you started.
7. Google Drawing is like the unsung hero of Google Apps for Education. There are many opportunities for engaging activities including the fabulous ideas from Rachel Marker (@RachelMarker) who suggests having students create a comic strip style drawing to tell a digital story. If students are showing what they know about a story they have read they can insert a text box and provide evidence to support their thoughts about the book. Geri Coats (@GeriCoats) shared an example of a character poster activity that has students combine an image of a character, with a trait, and commentary. Matt Miller (@jmattmiller) recently wrote a post giving a much needed shout out to this underutilized app. Check out 10 Engaging Google Drawing Activities for Students for even more great ideas!
8. Pablo Diaz (@teachingusingtech) recommends using Google Story Builder, an easy to use app that allows students to create digital stories as easily as writing on Google Doc. They can add their own characters and even personalize with music. Google Story Builder is fun and incredibly easy to use that your students can begin using tomorrow!
9. Blogging gets students writing for an authentic audience. Geri Coats (@GeriCoats) suggests using Blogger as place for students to publish their digital stories. Blogger is a great blogging platform because since it is a Google App it has a familiar feel for students who use GAFE tools. ReadWriteThink.org has a useful strategy guide for teaching with blogs for students in grades 6-12.
10. Showcasing your students' digital stories is easy to do with Google Sites. Josh Harris (@EdTechSpec) recommends using sites as a place for students to embed their digital stories told using videos, docs, slides and more. Check out Google Sites As a Tool For Student Portfolios from Flipped Education for tons of resources for using sites.
BONUS!
Check out this awesome Chromebook Digital Presentations Google Doc that Scott Padway (@ScottPadway) shared with us. Once your students are familiar with digital storytelling and are ready for a choice and challenge you can turn them loose and let them pick. He has even included tutorials for the apps! Ben Lausten (@LaustenTeaching) had the brilliant idea to create a collaborative google doc to crowdsource the awesome ideas shared during #TOSAChat. Check out the #TOSAChat on Digital Storytelling doc and add ideas of your own!
A big, HUGE thank you to our guest moderator, Ryan O'Donnell (@creativeedtech) for hosting a fabulous #TOSAChat! Ryan is a Tech TOSA for Rocklin Unified School District in Northern CA. He is a former Social studies teacher trying to help teachers integrate technology in their classrooms. Ryan often shares his awesome at conferences and hosts a podcast with Brian Briggs (@BriBriggs) call Check This Out (@CheckThisOutBR). For more edtech resources and strategies visit his website creativeedtech.weebly.com.
#TOSAChat was started by Ben Cogswell (@Cogswell_ben), Joe Young (@Jyoung1219), Kelly Martin (@kmartintahoe) and myself as a way for Teachers On Special Assignment to connect, share and grow together. Check out tosachat.weebly.com to view past chats storify links and upcoming questions. You can join us at 8PM PST on Monday nights.
Subscribe to:
Posts (Atom)